![[Previous]](prev.gif)
![[Home]](home.gif)
![[Next]](next.gif)
3D Geometries

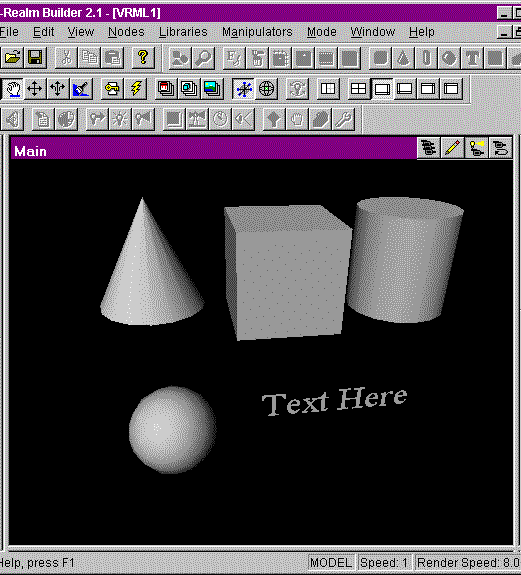
You start building a 3D graphics world with geometrical primitives which are then transformed and combined into more complex entities. The main geometrical elements in VRML are:
- Simple elements in the form of
cubes, spheres, cones, cylinders, and text. The text is
really only 2-dimensional but can be viewed from any angle
in 3D.
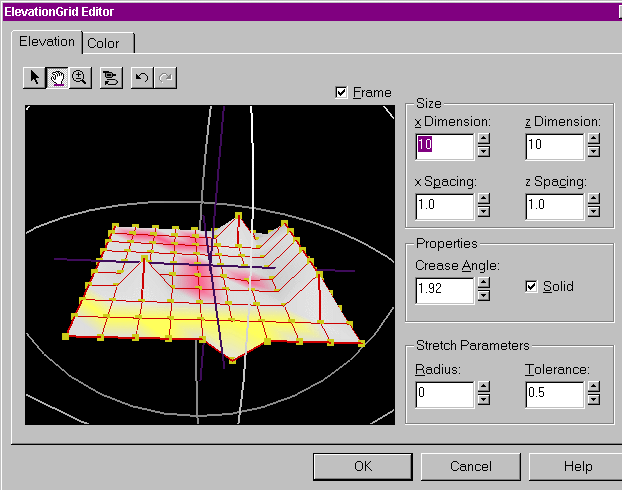
- An elevation grid that lets you
define "bumpy" 2D surfaces. You use the mouse to move the
vertix of each point
or group of points, up or down to create the bumps.
When you click on a point a large double-arrow appears which
lets you move the vertix up or down. If you hold the
control ket down while selecting other points
you can move groups of points together.
The "crease angle" controls the sharpness of the bumps, the
X and Y dimensions control the fineness of the grid, the color
control lets you paint or "spray" the grid. You can manipulate
the grid in 3D with the "hand" figure in order to better access
vertex points.
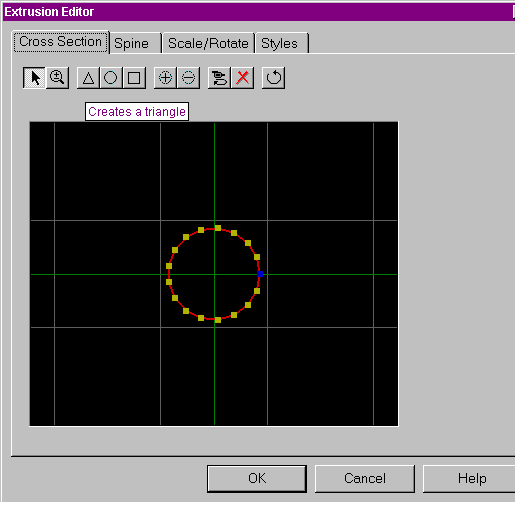
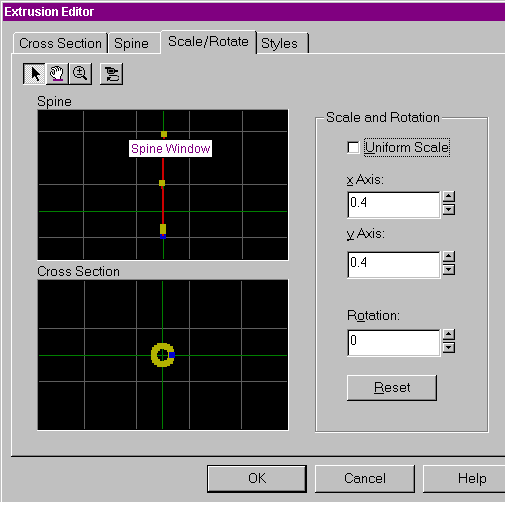
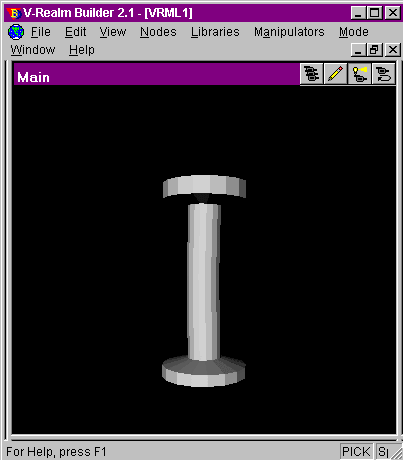
- The extrusion grid lets you
extrude objects in 3D. Here we see 3 views of this operation:
- A view from the top, where we have chosen a circle.
We can use the mouse to add, remove, or move points and
so modify the circular shape which will be extruded.
- A view from the side that shows the "spine" of the object
looking from the side. If we click on a point (it turns
blue) then we can control the diameter of the object at that
point as well as its rotation. This shows that the
diameter at the blue point has been reduced to 40 percent
of its normal value. You can also add and move points in 2D
but there don't seem to be any controls to constrain the
movement to 90 degree moves.
- The 3rd view shows the completed "Doric" column. Its a little
crooked due to the difficulty in controlling the spine.
- A view from the top, where we have chosen a circle.
We can use the mouse to add, remove, or move points and
so modify the circular shape which will be extruded.
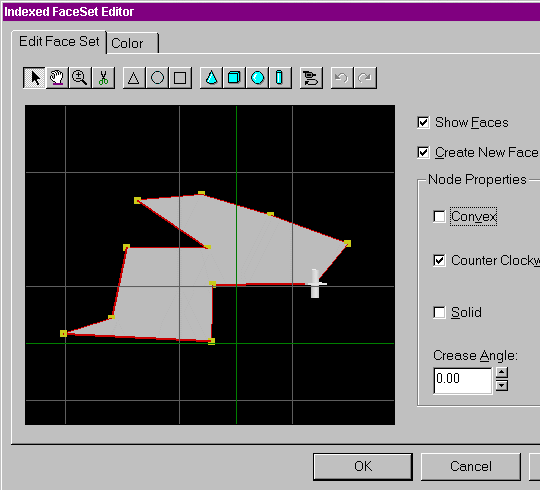
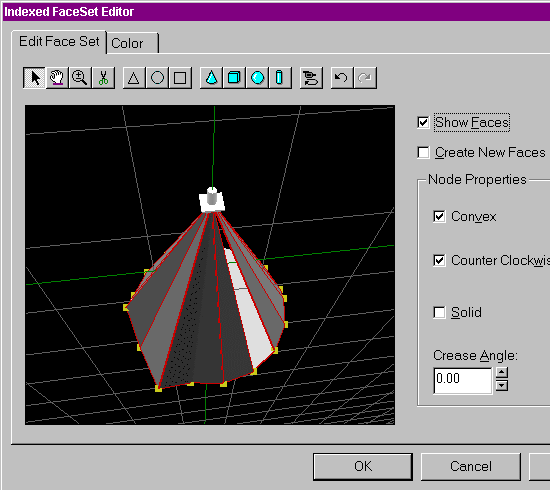
- An indexed face set . This is the most
complex of the geometric building blocks. It also lets you create
objects that have interiors that you can enter by zooming in. Here
we show a number of views of this operation:
- In the 1st view we see a planar figure which
can be created and manipulated as follows:
- Start with a planar figure by clicking on one of the 3 gray geometric icons near the top as opposed to the 3 blue solid geometry icons. A triangle, circle, or square appears with points highlighted in yellow.
- To move a point position the
mouse over it until it turns blue: then click
on it and a strange white icon that looks like a
small cylinder with a square disk around its middle
appears. This controls movement as follows:
- If you move the mouse to the upper or lower ends of the cylinder and click, you can drag the point up or down parallel to the Y-axis
- If you move the mouse to the square disk, and click on it, two long purple arrows appear in the X-Z plane. These let you drag the point anywhere in that plane.
- To constrain the movement to be exactly parallel to either the X or Z axis, you first hold down the shift key before you click on any point. You continue to hold the shift key down as you move.
- To create new points, set the controls on the right side
of the screen as follows:
- [*] Show Faces
- [*] Create New Faces
- [ ] Convex
- [*] Counter Clockwise
- [ ] Solid
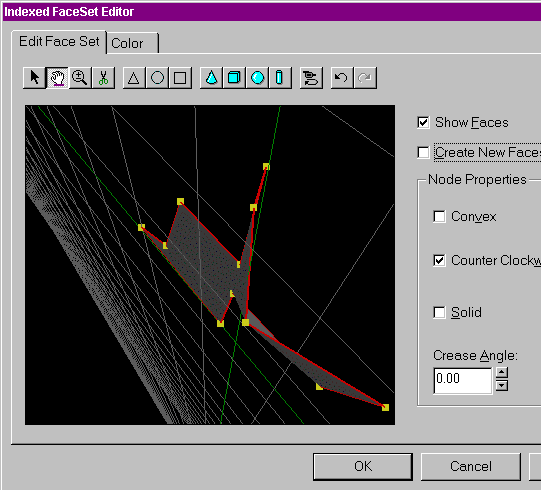
- In the 2nd view you use the "hand" icon to move the
planar figure into the Z-dimension. Then, if you click on a
point and the cylinder icon appears, you can more easily grab
an edge of the square and move it in 3D (arrows appear that
show you where you can go). If you use the SHIFT key you can
constrain the moves to be exactly parallel to an axis.
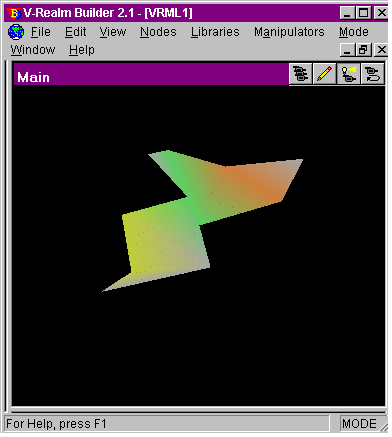
- The 3rd view shows the final object after it has been colored.
- The 4th view shows a 3D cone where some of the vertex points
have been moved and one of the sides is cut out so you can
see the interior.
- In the 5th view we see a modified version of this cone after it has been mapped with a firey texture. Since this display is rendered through Cosmo Player you can move it about, see its insides, and even enter inside it.
A word of warning about the V*RealmBuilder implementation of VRML: the extrusion and indexed face set aspects of it are poorly implemented and very confusing to use:
- While you can delete an entire polygon (a "face") with the scissors tool, it appears you cannot delete a point
- If you don't click exactly on an existing point, it creates a new one that you can't get rid of
- You can zoom in, and rotate, but you can't move the image around or enlarge the screen, or zoom out (except to zoom all the back with the "reset viewer" icon near the top right)
- While you can complete a polygon usually by connecting
with its initial point, often that point will fail to
to turn blue (indicating that it has been selected)
and the polygon will remain unconnected
and no face appears.
All-in-all this one aspect of V*RealmBuilder is very
immature.
Here we see another example of an indexed face set which shows a cube where the coordinates of the corners and the numbering sequence of the corners which define the faces appears. The actual code that creates the cube looks like this:
point [
  1  1  1,   1 -1  1,  -1 -1  1,  -1  1  1,
  1  1 -1,   1 -1 -1,  -1  1 -1,  -1 -1 -1
]
coordIndex [
  0,  1, 2,  3, -1,  4,  5, 1,
  0, -1, 6,  7,  5,  4, -1, 3,
  2,  7, 6, -1,  3,  6,  4, 0,
  -1, 2, 1,  5,  7, -1 ]
Now non-VRML systems can handle more complex geometrical primitives such as various types of bi-cubic splines, the best known of which are Bezier surfaces and NURBS. These allow for very complex smooth 3D surfaces without the need for thousands of polygons. Such surfaces often provide much more realism than can be found in VRML.
- In the 1st view we see a planar figure which
can be created and manipulated as follows:
![]()
Class Topics