


To understand the fade effects on the left-hand menu, you'll need a grasp of basic HTML & CSS, as well as a passing acquaintance with the DOM. (The first 4 pages of the DOM overview should suffice.)
A stroll through the
underlying
HTML & CSS
The HTML
The menu is a list, with each link in a list item:
<li>
   <a>link</a>
</li>
An optional DIV stores more information, if needed:
<li>
   <a>link</a>
   <div>
      (optional screenshot / descriptive text)
   </div>
</li>
It's the optional DIV that fades in and out.
<li>
   <a>link</a>
   <div>
   </div>
</li>
That's it for the markup.
The CSS
The DIV's initial style is set by a single rule, so we'll examine it line by line.

Here's the entire rule:
#menu li > div {
	visibility: hidden;
	position: absolute;
	z-index: 99;
	width: 225%;
	top: 0;
	left: 15.5em;
	}
The > limits the rule to DIVs that are children of LI.
#menu li > div {
	visibility: hidden;
	position: absolute;
	z-index: 99;
	width: 225%;
	top: 0;
	left: 15.5em;
	}
The selector ignores grandchildren or later descendants.
The first declaration hides the child DIVs.
#menu li > div {
	visibility: hidden;
	position: absolute;
	z-index: 99;
	width: 225%;
	top: 0;
	left: 15.5em;
	}
Absolute lets them appear over normal elements.
#menu li > div {
	visibility: hidden;
	position: absolute;
	z-index: 99;
	width: 225%;
	top: 0;
	left: 15.5em;
	}
A high z-index lifts them above other elements.
#menu li > div {
	visibility: hidden;
	position: absolute;
	z-index: 99;
	width: 225%;
	top: 0;
	left: 15.5em;
	}
Their width is a percentage of the menu's width.
#menu li > div {
	visibility: hidden;
	position: absolute;
	z-index: 99;
	width: 225%;
	top: 0;
	left: 15.5em;
	}
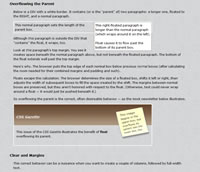
The last 2 declarations depend on another rule.
#menu li > div {
	visibility: hidden;
	position: absolute;
	z-index: 99;
	width: 225%;
	top: 0;
	left: 15.5em;
	}
The parents of the DIVs are positioned as relative.
#menu li {
	position: relative;
	}
Normal elements appear on a web page one after the other. These have static position.
When an element's position is relative, it's laid out in just the same way. It looks identical to a normal element..
So why use relative position?
An element that's not static creates a containing block for its descendants. So, position: relative makes LI the containing block for its hidden DIVs.
#menu li {
	position: relative;
	}
A containing block sets the starting point for measuring offset properties, like top and left.
Because the parent LI is a containing block, top: 0; makes the child DIV level with it.
#menu li > div {
	visibility: hidden;
	position: absolute;
	z-index: 99;
	width: 225%;
	top: 0;
	left: 15.5em;
	}
For the same reason, left: 15.5em; pushes the DIV to the right of the #menu column.
#menu li > div {
	visibility: hidden;
	position: absolute;
	z-index: 99;
	width: 225%;
	top: 0;
	left: 15.5em;
	}
And that's it for the CSS.
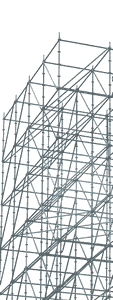
They create a scaffold for the effect. We'll need to examine the Javascript to answer
A Few Questions
Q1: What casts the shadow?
<li>
   <a>link</a>
   <div>
   </div>
</li>
A DIV can't cast a shadow, so how does this happen?
Q2: What watches the mouse?
The fade-in / fade-out is triggered by the mouse.
How does the page know where your mouse is and which DIV to reveal or hide?
Q3: How can something fade?
The mouse is either on a link, or it's off. But fading is due to a series of small changes over time.
And quick movements in and out of a menu link cause a mere glimmer of its child DIV to appear.
Put more simply,
How is time managed?
Continue below to see how Javascript builds on the scaffold provided by HTML and CSS.
return
to
start
End of Slides
The Javascript
Javascript has 4 jobs:
find the #menu links
reveal the shadow
add event handlers
alter opacity progressively
Before we examine the code, we need to add Javascript to our page.
We'll do this at the bottom of the markup to insure the whole page arrives before the script executes.
</body>

<script type="text/javascript" src="index.js">
</script>

</html>
Browsers fire an onload event when a page is loaded.
In the script file, we'll ask the onload event to run a custom function named initMenuDivs().
window.onload=function() {
	initMenuDivs();
}
The function could be named
anything, e.g., "get_busy()"
or "launch_the_turtle()".
Now we're ready to start.
The instructions we want Javascript to execute will begin in the initMenuDivs() function.
Coded like this:
function initMenuDivs() {

}
Between the curly braces we'll tackle the first job.
Quick Reminder

As you know from the DOM overview, a browser creates a document object for each web page.
Document's getElementByID() method can find any element that's been assigned an ID.
So . . .
We can find the DIV element identified as #menu
<div id="menu">
	. . .
</div>
with this code
var m = document.getElementById('menu');
Javascript creates a variable named m that refers to #menu. Through m we can reach all the properties and methods the browser has created for #menu.
To reduce typing, I borrowed someone else's idea and wrote a little utility function getid().
function getid(s) {
	return document.getElementById(s);
}
We'll use this shorter line of code
var m = getid('menu');
to get the same result — m still refers to the element identified as #menu.
Another reminder
A browser gives each HTML element an assortment of properties and methods — tools we can use to work with a page in real-time.
Once we've found #menu, we can discover all the "a" tags it contains, using one of #menu's tools — its getElementsByTagName() method.
var a = m.getElementsByTagName('a');
The line above creates an array named a. Each item in the array refers to a link inside #menu.
a[0]		(menu's first link)
a[1]		(menu's second link)
As before, I've created a utility function to save typing.
function gettags(e,t) {
	return e.getElementsByTagName(t);
}
We send gettags() an element and the tag name we want to find.
var a = gettags(m,'a');
Remember that m refers to #menu, so the line above finds all A tags in #menu.
We've found all #menu's links
with 2 lines of code
var m = getid('menu');
var a = gettags(m,'a');
However, we're only interested in #menu as a way to reach its links.
We don't really need an m variable hanging around with nothing to do.
Instead, we can combine the 2 lines into a single instruction.
This code gets an object from document and immediately uses that object to find any links it contains.
var a = gettags( getid('menu'), 'a' );
We wind up with our a array just the same.
The first job is done.
Here's our function so far:
function initMenuDivs() {
	var a = gettags( getid('menu'),'a' );
}
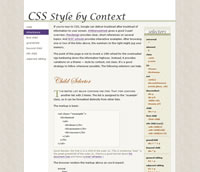
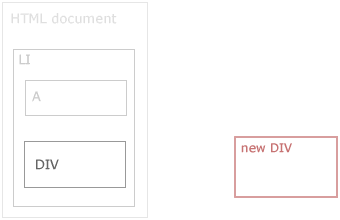
OK, so it's not a shadow.
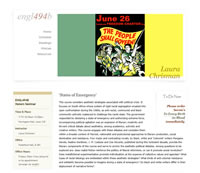
It's a background image. This paragraph has a dashed border. It also has a background image of a shadow. An element's background always falls inside its border.
However, if the element has a child positioned precisely, the child can appear to cast a shadow by sitting just above the parent's background image.
CSS can provide the positioning and the background. And Javascript can create a new DIV to hold the background.
The new DIV goes around the optional DIV that fades in and out. We want to wind up with this:
<li>
   <a>link</a>
   <div>	(new parent DIV w/shadow background)
      <div>...</div>	(optional DIV)
   </div>
</li>
We could add all the new DIVs manually, but it's easier to ask Javascript to do it for us.
So far, our function has given us access to all the links in #menu. And we know that every link is the child of an LI.
<li>				(parent)
	<a>link</a>	(child link)
	<div>...</div>	(optional child DIV)
</li>
As you can see above, the optional DIV is also a child of the same LI.
We can find each link's parent through its parentNode property.
var p = a[0].parentNode;
This creates a variable named p that refers to the parent of our first link.
<li>				(parent)
	<a>link</a>	(child link)
	<div>...</div>	(optional child DIV)
</li>
We can use the parent's getElementsByTagName() method to find all its child DIVs. And we can request just the first one found (note the [0]).
var childDiv = gettags(p,'div')[0];
Now, childDiv refers to the first child DIV LI contains.
<li>
	<a>link</a>
	<div>...</div>   (optional child DIV)
</li>
But a child DIV might not exist.
<li>
	<a>link</a>
</li>
In that case, childDiv will be undefined.
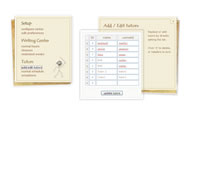
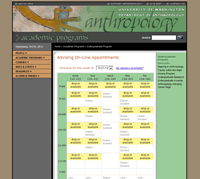
You'll notice that "wcenter (gone)" and "chid (gone)" in the menu show nothing when you mouse over them. They contain no child DIVs.
So we need to make sure we've found a child DIV before trying to work with it.
In Javascript, we use == to see if things are equal, and != to see if they're NOT.
This line tests for the existence of a child DIV.
if (childDiv != undefined) {

}
Instructions between the curly braces will be skipped if a child DIV doesn't exist, so we can safely put code there that depends upon the child DIV's existence.
Our function now looks like this.
function initMenuDivs() {
   var a = gettags( getid('menu'),'a' );
   var p = a[0].parentNode;
   var childDiv = gettags(p,'div')[0];
   if (childDiv != undefined) {

   }
}
We're ready to insert the 3 lines of code that will add the shadow-bearing DIV.
The next bit will make more sense if you review the summary at the top of DOM: Creating Elements. We'll use the createElement() and appendChild() methods described there.
I've created utility functions for these methods also:
function dce(s) {
   return document.createElement(s);
}
function ac(p,c) {
   return p.appendChild(c);
}
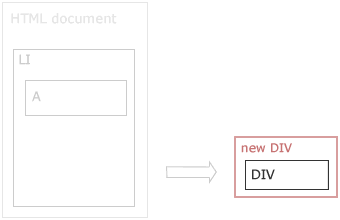
The first line of code creates a new DIV element (using document's createElement() method).
var newDiv = dce('div');
ac(newDiv,childDiv);
ac(p,newDiv);
The variable newDiv let's us reach the tools the browser creates for our brand new DIV.
At this point, the browser has created the new DIV, but it's unconnected to the HTML document.
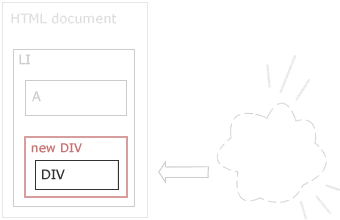
The 2nd line moves the original child DIV into the newly-created one (using newDiv's appendChild() method).
var newDiv = dce('div');
ac(newDiv,childDiv);
ac(p,newDiv);
(The more usual way to issue this instruction is
newDiv.appendChild(childDiv);
but I'm on this reduced-typing jag.)
An element can exist in only 1 place. So, appending an element, removes it from its original location.
Third, we append the new DIV to the original parent LI, using the parent's own appendChild() method.
var newDiv = dce('div');
ac(newDiv,childDiv);
ac(p,newDiv);
The new DIV has now taken the place of the original DIV, bringing the original along as its child.
Tada! Javascript has created this:
<li>
   <a>link</a>
   <div>		(our new DIV w/shadow background)
	   <div>...</div>	(optional child DIV)
   </div>
</li>
We don't have to worry about keying in the extra DIVs ourselves.
Job 2 is done
Remember the rule for "#menu li > div" we scrutinized above? These added declarations
padding-bottom: 10px;
background: transparent url(img/menu_botR.png)
   50% 100% no-repeat;
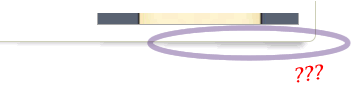
nudge the inner DIV up so the parent's background can peek out below it.
Here's the function now . . .
function initMenuDivs() {
   var a = gettags( getid('menu'),'a' );
   var p = a[0].parentNode;
   var childDiv = gettags(p,'div')[0];
   if (childDiv != undefined) {
      var newDiv = dce('div');
      ac(newDiv,childDiv);
      ac(p,newDiv);
   }
}
With 2 more lines of code, we'll finish the 3rd job, too.
The browser watches the mouse constantly.
When you move the mouse pointer on and off any element, the browser fires a mouseover and mouseout event.
We just need to tell the browser what to do when either event occurs.
So, we'll add two
event handlers for
mouse events
on #menu links.
Remember, a[0] refers to the first menu link.
We'll use its setAttribute() method to add our event handlers to the link:
a[0].setAttribute("onmouseover","showdiv(this,1)");
a[0].setAttribute("onmouseout","showdiv(this,0)");
Again, to save a bit of typing, I've written this custom function:
function sa( e, a, val ) {
   return e.setAttribute( a, val );
}
So our 2 lines of code are these:
sa( a[0], 'onmouseover', 'showdiv(this,1)' );
sa( a[0], 'onmouseout', 'showdiv(this,0)' );
What's happening here?
sa( ) identifies the function whose instructions Javascript should follow.
sa( a[0], 'onmouseover', 'showdiv(this,1)' );
Bits of information the sa( ) function needs are listed between the parentheses.
These are called arguments. They make it possible for one set of instructions to work with many elements.
The first argument names the element whose setAttribute() method we want to run.
sa( a[0], 'onmouseover', 'showdiv(this,1)' );
The second argument lists the event we want to insert as an attribute of the element.
sa( a[0], 'onmouseover', 'showdiv(this,1)' );
The third argument, showdiv(this,1), lists the function whose instructions we want the browser to follow when the event occurs.
sa( a[0], 'onmouseover', 'showdiv(this,1)' );
When Javascript processes this instruction
sa( a[0], 'onmouseover', 'showdiv(this,1)' );
our original markup
<a>link</a>
becomes the equivalent of this
<a onmouseover="showdiv(this,1)">link</a>
The same is true for the 2nd line of code:
sa( a[0], 'onmouseout', 'showdiv(this,0)' );
It's as though we entered this in our page:
<a onmouseover="showdiv(this,1)"
   onmouseout="showdiv(this,0)">link</a>
Job 3 is done.
We've attached 2 event handlers to the first link in #menu.
Whenever the mouse enters or leaves the link, the browser will follow the instructions in our "showdiv()" function (which we'll examine in a sec).
There's just one unfinished piece of business.
We have a lot of links.
And our function has only modified the first one.
To process all the links this way, we'd need over 160 lines of code.
Fortunately, Javascript provides
for loops.
A for loop repeats a set of
instructions until it reaches
a terminal condition.
We can create a for loop to process all the links found in #menu.
Like this:
for ( i=0; i < a.length; ++i ) {
	(repeated instructions go here)
}
Here's what it means.
Any for loop needs 4 things:
- a variable
- a start value
- a repeat condition
- an update amount
The parentheses hold this information.
for ( i=0; i < a.length; ++i ) {
	(repeated instructions go here)
}
The variable and its start value occur first.
for ( i=0; i < a.length; ++i ) {
	(repeated instructions go here)
}
Here, we're saying set a variable named i equal to 0.
This happens only once, when Javascript first encounters the for loop.
From here on out, Javascript does the same thing over and over.
It checks the repeat condition.
for ( i=0; i < a.length; ++i ) {
	(repeated instructions go here)
}
If i is less than the number of links in our a array, it performs the instructions inside the loop.
Then Javascript updates the value of i — in this case, increasing it by 1.
for ( i=0; i < a.length; ++i ) {
	(repeated instructions go here)
}
Then it retests the repeat condition. If it's still true it performs the instructions in the loop again.
In this way, i takes on the values 0, 1, 2, 3, etc., until it finally equals the number of links in our #menu.
All that remains is to put a for loop inside our initMenuDivs() function, and change a reference like this
a[0]
to this
a[i]
Then, a mere 8 lines inside our loop can process all the #menu links.
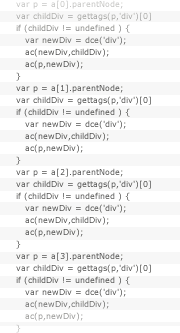
Our for loop looks like this:
for ( i=0; i < a.length; ++i ) {
   p = a[i].parentNode;
   childDiv=gettags(p,'div')[0];
   if (childDiv!=undefined) {
      newDiv = dce('div');
      ac(newDiv,childDiv);
      ac(p,newDiv);
      sa(a[i],'onmouseover','showdiv(this,1)');
      sa(a[i],'onmouseout','showdiv(this,0)');
   }
}
With each bump in i's value, our code examines the link in our #menu referred to by a[i].
If appropriate, it adds the extra DIV and inserts our event handlers.
When i finally equals the number of links in our #menu, Javascript stops executing these instructions and exits our initMenuDivs() function.
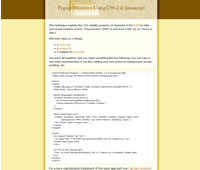
So here's the completed function.
Oops!
It's grown too tall for this window.
We'll use Javascript to make this
window taller.
3 of the 4 jobs are done: initMenuDivs() finds each #menu link, adds extra DIVs for the shadow effect, and references showdiv() to handle two mouse events.
function initMenuDivs() {
   var a = gettags( getid('menu') ,'a');  // array of links
   var p, newDiv, childDiv;  // variables for our loop
   for ( i=0; i<a.length; ++i ) {  // repeat for all links
      p = a[i].parentNode;  // find LI parent of link
      childDiv=gettags(p,'div')[0];  // seek its 1st child DIV
      if (childDiv!=undefined) {  // if it exists
         newDiv = dce('div');  // create new DIV
         ac(newDiv,childDiv);  // move child DIV into it
         ac(p,newDiv);  // put both back into LI
         // add our handler for mouseover & mouseout
         sa(a[i],'onmouseover','showdiv(this,1)');
         sa(a[i],'onmouseout','showdiv(this,0)');
      }
   }
}
It's time to examine
showdiv()
It launches the chain of events that takes care of Job 4.
Showdiv's part in altering opacity is indirect, but crucial. At heart it's a
branch statement.
It doesn't alter opacity — it routes
Javascript to the functions that do.
There's more to showdiv() than this, but let's start with the major bones of its skeleton.
Here's where the branch occurs.
function showdiv(e,n) {
  if (n==0) {
     fadeout();
  } else {
     fadein();
  }
}
You can see it tests the argument n to decide whether to call a fadeout() or fadein() function.
function showdiv(e,n) {
  if (n==0) {
     fadeout();
  } else {
     fadein();
  }
}
Note that n is the 2nd argument.
And we know where n gets its value. The event handlers initMenuDivs() installed for us are nearly identical.
showdiv(this,1)
showdiv(this,0)
They call showdiv() with 2 arguments. The 2nd has the value of 1 or 0. Hence, n will be 1 or 0.
function showdiv(e,n)
But what's this?
showdiv(this,1)
showdiv(this,0)
What value does the demonstrative pronoun hold?
this
refers to the current object
<a onmouseover="showdiv(this,1)"
   onmouseout="showdiv(this,0)">link</a>
The events we assigned to each menu link make the link itself the current object.
So, this will refer to whatever link the mouse pointer enters or leaves.
Thanks to its 2 arguments ...
function showdiv(e,n)
showdiv() knows where to look and what to do.
Through e it can find the child DIV, and n shows whether that div should fade in or out.
We'd be nearly done, if it weren't for the following problem:
multiple links
and twitchy users
A mouse can whip over menu links at any speed.
When the mouse moves rapidly, it might traverse several links before the first child DIV has finished fading in. Each traverse fires 2 calls to showdiv() for mouseover & out events, and each call creates a new job for the browser.
The jobs can stack up.
We have 2 things left to discuss, then:
managing rapid events
creating the fade effect itself
The remaining code in showdiv() manages rapid events.
. . . continue from here . . .
...random notes follow...
Opacity is a style property. It can be set in a style sheet, just as color and visibility can.
But fading in or out requires small changes over time.
That's a job for Javascript.
It can alter style on the fly,
and it can
delay
these changes.
if (n==0) {
  with (waning) {
    while (t.length>0) fade_reset(0);
    t.push(new menu_obj);
    t[0].e=gettags(e.parentNode,'div')[0].style;
    t[0].c=(waxing.t.length>0) ? waxing.t[0].c : max;
    fadeout();
  }
} else {
  with (waxing) {
    while (t.length>0) fade_reset(1);
    t.push(new menu_obj);
    t[0].e=gettags(e.parentNode,'div')[0].style;
    if (waning.t.length>0) {
      t[0].c=(waning.t[0].e==t[0].e) ? waning.t[0].c : min;
    } else {
      t[0].c = min;
    }
    t[0].e.visibility='visible';
    fadein();
  }
}
Sometimes
An Idea
takes Time to implement.
blank slide
return
to
start
Current End of Slides
Points to cover:
- onload() Javascript uses DOM to . . .
- locate all #menu links
- test for a child DIV
- create a brand new DIV
- move child DIV into new DIV (hence the "shadow" effect — CSS rule anticipates this)
- append the new DIV (and its child) to original LI
- add mouseover and mouseout attributes to #menu link
- showdiv() function
- something here
- fadeout() & fadein()
- something here
- objects and arrays that reference child DIVs
- something here
- edge cases
- nearly simultaneous wax/wane on same element
- killing timing events for rapid taversal of menu — many in/out mouse events
Progressive changes to the DIV's opacity (a CSS property) causes it to fade in and out. Javascript applies the changes in real-time based on mouse events.
- onload() function launches the routine that identifies menu items
- initMenuDivs() function locates menu items and attaches events
- onmouseover and onmouseout events trigger fadein and fadeout routines
- the fading routines manipulate CSS "opacity" and "visibility" and depend on Javascript's timeOut