PowerPoint Tutorial - Add Text to Master Slide
Sometimes you want the same text to be on all the slides in your presentation. This is like a header or footer in a word processing document. You may want a certain graphic, like a school district logo to appear on every page. To accomplish that, you need to put the text on the Master Slide. This is a two step process. To add text, date, or slide numbers in the footer area, you need to go to the Insert tab and choose Header & Footer.

The Header & Footer dialog box allows you to add dates, footer text, or slide numbers to the current slide or all the slides. Click on Apply to All to apply the footer text to every slide.

Here is the result of Apply to All with the above settings on a presentation with 4 blank slides.

Let's say we want to add a graphic to every slide and move the footer text to a different location on every slide. To do this we will need to edit the Master slide.
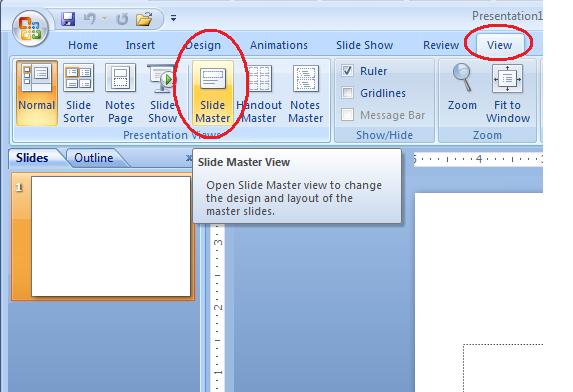
To edit the Master slide, go to the View tab and choose the Slide Master button.

Here is the Slide Master view. If you are on a title slide the title slide master will be the slide ready for editing. If you are on a content slide, then the content slide master will be the one displayed for editing. You may switch between the different masters by clicking on the thumbnails on the left.

We will rotate and move the footer text that was applied from the Insert tab.

Here is how to rotate the footer text.

The footer text rotated and moved.

Now, let's put a graphic on the master slide so it shows up on all the slides. Here is a graphic pasted in and moved to the lower right corner.

Close the Master view:

Here is a blank slide with the footer text rotated and moved and a graphic pasted in the master.
