PowerPoint 2007 Tutorial
PowerPoint is a presentation program. It creates visual "slides" to accompany the oral part of a presentation. It can do more than that, but that is the main use. This tutorial is for PowerPoint 2007. If you would like to see the tutorial for PowerPoint 2003 click here.
The best way to work through this tutorial is to start up PowerPoint and switch back and forth between this tutorial and the actual program so that you can try out the features as we go.
There are two ways to enter the text in a presentation: 1) use Outline View and type in the presentation as a series of main points and sub points, or 2) work on each slide as you go. We will look at each of these methods in turn.
Creating a Presentation Using Outline View
To start, we recommend using the Outline view to get the first draft of your presentation. After getting in the basic slides and text, you will want to work on the slide one by one. To get started using the Outline view, click on the Outline view tab on the left side of the screen. Here is the main screen from PowerPoint showing the tabs and the Outline View tab.

When you click the Outline tab, the outline view appears and the first (title) is displayed at the top of the screen. To enter the title of the presentation: "Technology - Curriculum Integration", simply click next to the slide and type.

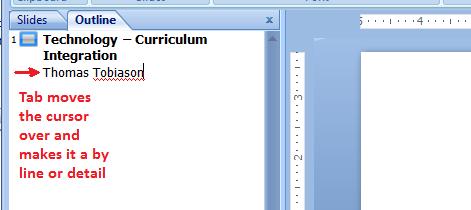
Now to add in the "by line" (the subtitle or name of the presentation author), press ENTER. This will move the cursor down to the next line. Next press the Tab key once. This will move it over to the right. Type in your name.
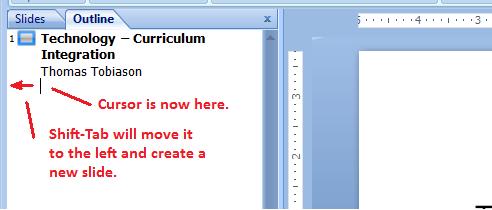
Now we want to add in the other "slides" in the presentation. To move the cursor back to the left after typing in your name, first press ENTER. Then hold the "Shift" key down and press "Tab" (Shift-Tab). This will create a new slide (slide 2) and the cursor should now be in place to type in the title for the second slide. By the way, learning to use Tab and Shift-Tab will save you time on ANY page where there are fields to enter information. The next time you are filling in an online form, after typing in your first name, press Tab instead of clicking on the last name field. The cursor should jump to the last name field. If you use Shift-Tab, the cursor will jump back.
Type in the slide title, "What is Technology?" Then press ENTER. This creates a new slide. Press the "Tab" key to move the cursor over to the right to convert it into the first bullet point.
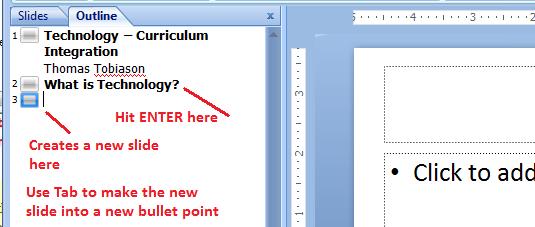
After hitting ENTER and creating a new slide, press Tab to convert the new slide into a bullet point. Like this:
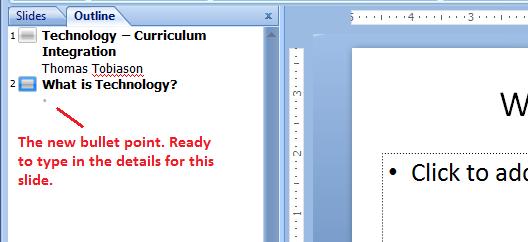
Type in the first bullet point, then hit ENTER. Then type in the rest of the bullet points that go on this slide in the same way:
- Computers
- Cameras
- Video tapes
- PDAs
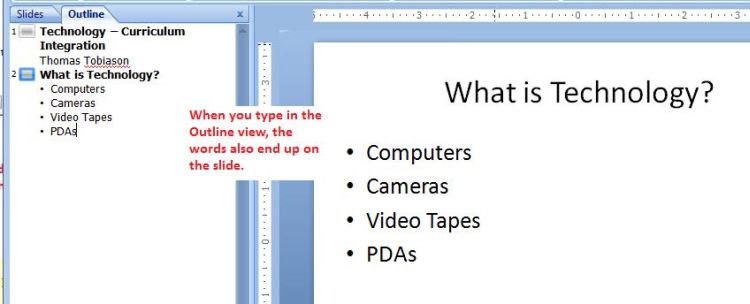
After typing the last bullet point, "PDAs", press ENTER. This will create a new bullet point.
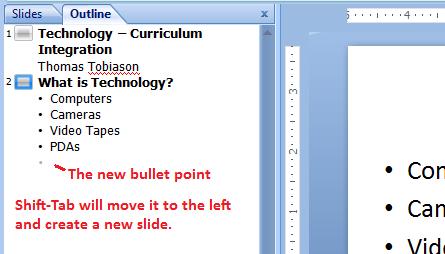
Press"Shift-Tab" to move back to the left and convert the bullet point into a new slide instead.
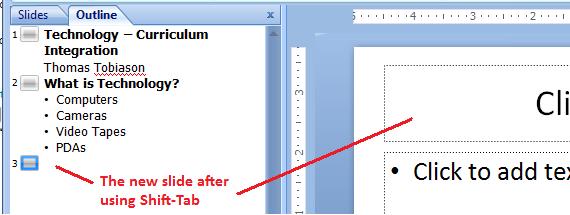
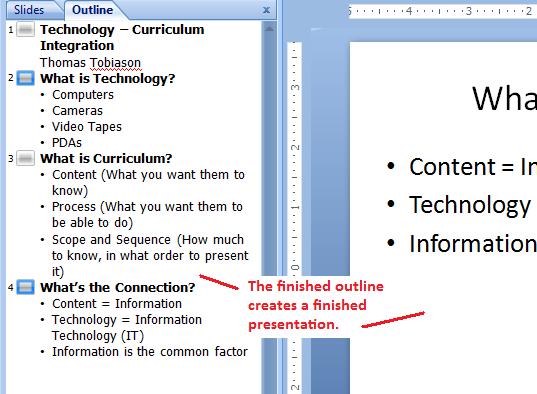
Use ENTER to create new slides, and use Tab and Shift-Tab to move the cursor right and left. The finished slide show in the outline view will look like this:
Creating the Presentation Slide by Slide
Even if you created your presentation in Outline view, you will end up working on each slide, one by one. You may create the presentation using the slide view as well. Here's how:

The finished title slide looks like this:

Now, we need to create the second slide and add in the text there. To create a new slide, use the Home tab and click on the "New Slide" button.

To get anew slide, click on the "New Slide" button. It has two places you can click on. You can automatically create a new slide or see a display of different slides to create.
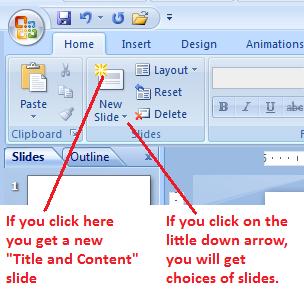
When you click on the down arrow part of the New Slide button, you will see the choices of new slide.

Add in the text for the second slide:
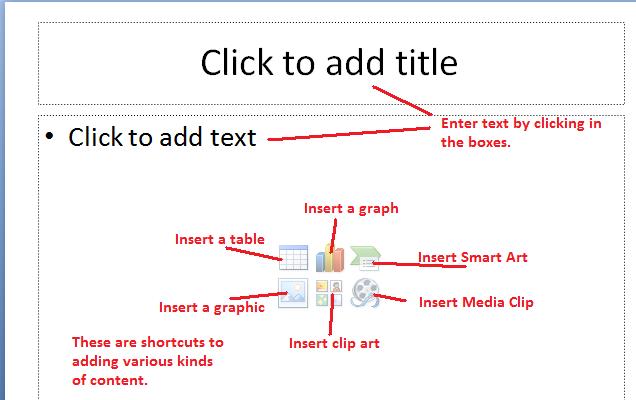
Continue adding slides and text until your are done.