Editing Content & Adding Images to SimpleSite Pages
Editing Content & Adding Images
A SimpleSite page is composed of sections. The sections can be moved up or down relative to each other. They can be deleted. New sections can be added to the page. And sections can be edited.
To add text, links, and images to a SimpleSite page, you need to click on the "edit" icon of a section.
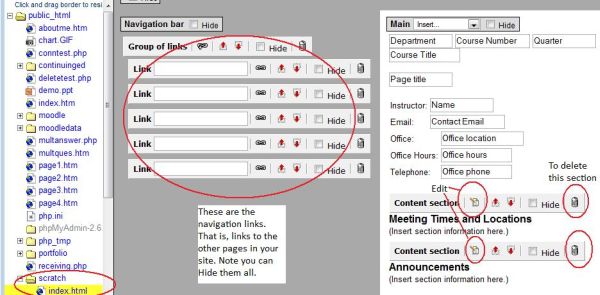
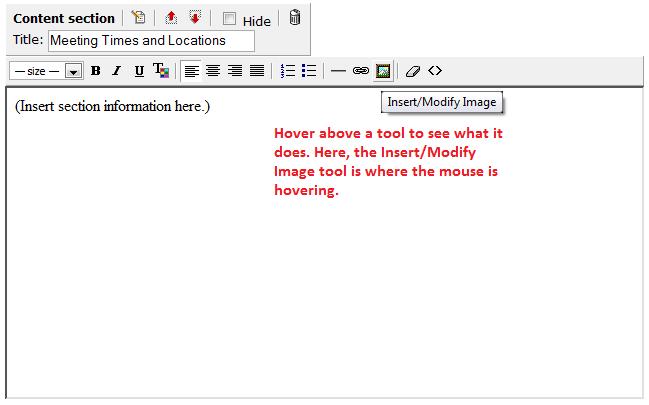
When you click on the "edit" button, the edit section screen appears. The top part of the screen has tool icons to allow you to enter text, change the font, size, and color of text, change the alignment of text (or images), add bulleted or numbered lists, or add in links to other web sites. If you "hover" above a tool icon, the function of the tool is displayed. Below, the mouse is above the Image icon.
Below, I have changed the title, inserted an image and typed in some text. Unfortunately, you will not be able to paste in text from somewhere else to get text into the page.

Inserting Images into Content Sections
To insert an image into a SimpleSite web page requires a little preparation. First, you must obtain the image you wish to use. This should not be something you get off the internet unless you have permission to use the picture or the picture site explicitly says their pictures are in the public domain. You can create your own pictures by drawing them in Paint, or scanning in drawing or paintings you have created on paper. Clip art is usually in the public domain, but often the picture format won't work with web pages. It's possible to change the format of clip art pictures by getting them to Paint and choosing Save As ... and changing the "Type of file" to *.JPG or *.GIF.
Once you have obtained pictures, you need to know where they are on your computer so that you can upload them to the web site. To add an image to a content section, you must:
- browse to find the image file you wish to upload
- choose the folder location where the file will be uploaded to
- upload the file
- check to see if the "Image Location" box has filled itself in.
- add "Alternate text" if you wish. This is displayed if the picture cannot display for some reason.
- choose "Alignment". This alignment refers to how text aligns on the picture. If you choose "Right", for instance, the picture will be on the far right and text will arrange itself next to the picture on the left.
Here are the steps and what they look like. This is the Insert Image dialog box.
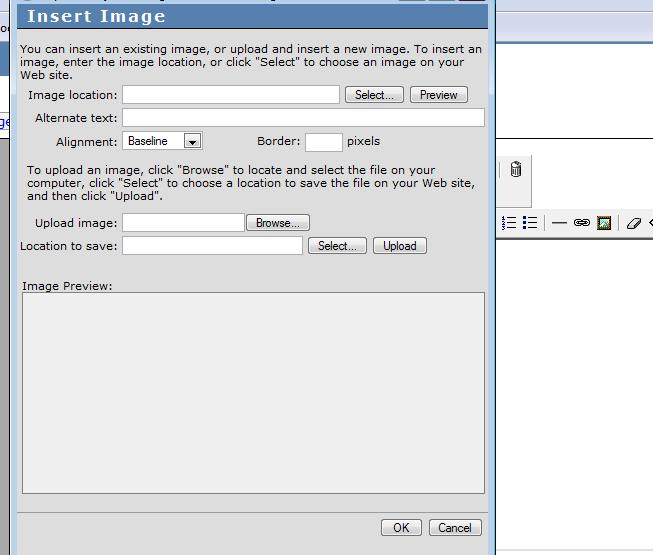
You start with Upload Image Browse button. Then you fill in the "Location to save:" You can do this by clicking on the folder in the folder list on the left.
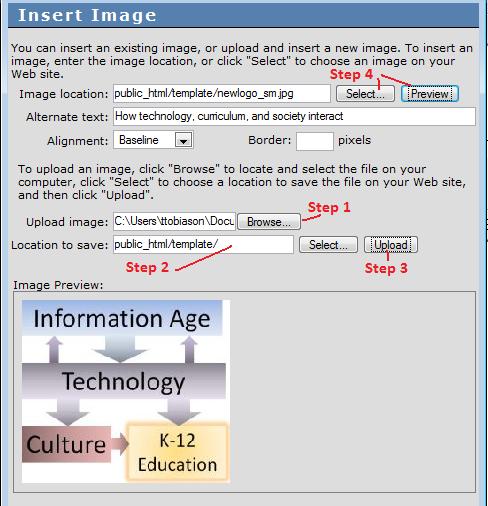
The screen above shows an uploaded picture and what it looks like after you choose the Preview button.
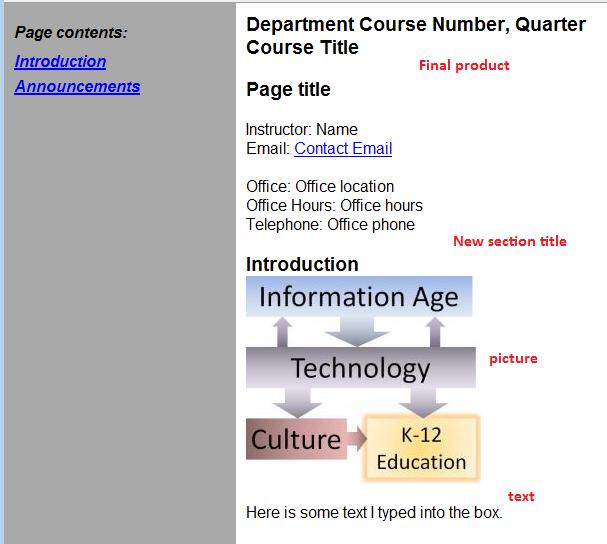
When you save the page, you can see what it looks like in a normal web browser. This page is in the folder template on my site. So I'll type in faculty.washington.edu/tobyt/template and look at the page as it is now.

This address gives this: