Scanning and Processing Black and White Negatives with VueScan and Darktable
Scanning with VueScan
The goal with scanning is to preserve the maximum amount of data present in the negative as possible while applying the minimum amount of processing. This is to allow for processing to be done at a later stage. However, there are a few modifications to the raw data I do want to happen automatically, such as mirroring and flattening to grayscale (for B&W).
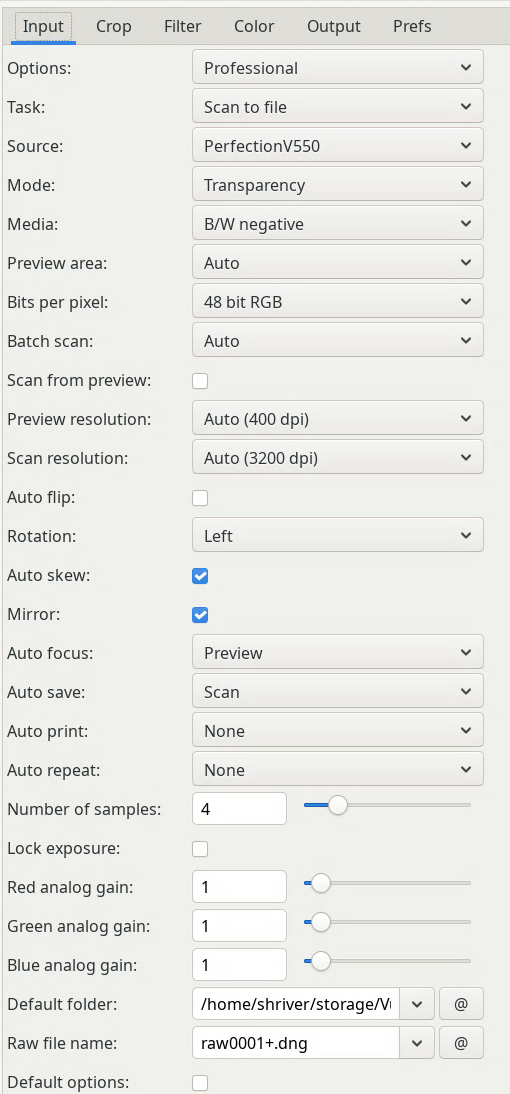
VueScan Input Tab
Screenshot of the VueScan Input Tab settings
I am using a flatbed scanner (Epson Perfection V550 Photo). The important settings here are:
-
Options: Professional
This enables the advanced options we need to set below.
-
Mode: Transparency
-
Media: B/W Negative
-
Bits per pixel: 48 bit RGB
This will retain full color information from the scanner. This will be flattened to monochrome on the Output tab to save disk space
-
Mirror: Checked
By default my Epson scanner wants the negatives emulsion side up, however I have found it much easier to load the negatives emulsion side down. This inverts to compensate.
-
Number of Samples: 4
VueScan Filter Tab
Ensure all options are ‘off’ here to prevent VueScan from doing any processing to the final RAW image file.
VueScan Output Tab
Screenshot of the VueScan Output Tab settings
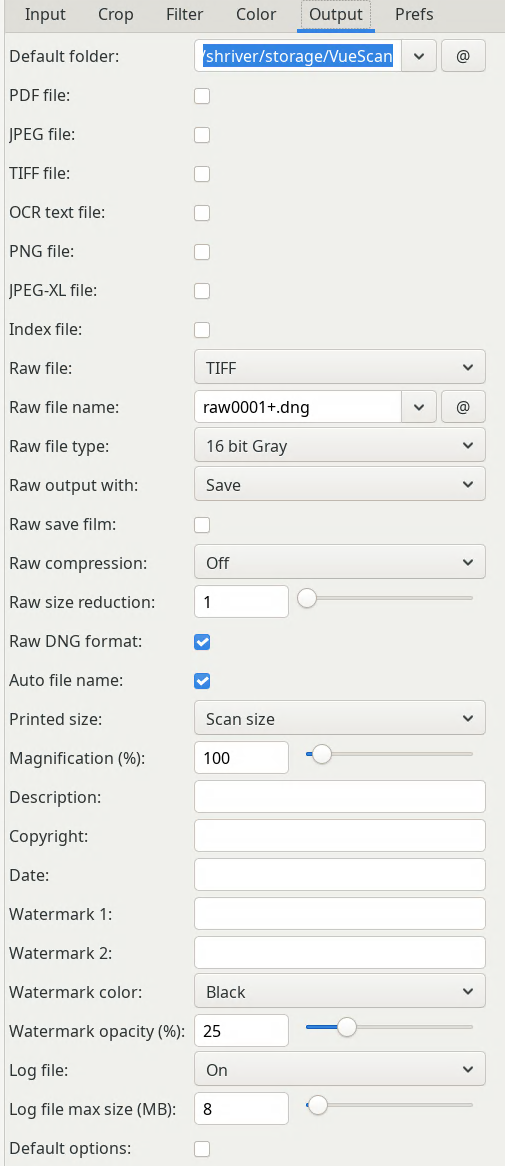
In order to save the Highest quality file we can, we are going to output a linear ‘RAW’ file instead of a TIFF or other format that will have had gamma correction enabled. Uncheck all the file formate boxes and then:
-
Raw File: TIFF
-
Raw File Type: 16 bit Gray
-
Raw Output With: Save
You can use ‘Scan’ here but the orientation and inversion settings will not be applied to the final file. With everythig in the ‘Filter’ tab off, this setting will theoretically be minimally processed, yet still retain orientation and mirroring
-
Raw save film: unchecked
-
Raw DNG format: checked
Much debate about this online. For Lightroom users this seems to trick lightroom into applying automatic gamma correction, which we do not want. For Darktable adding this will allow darktable to automatically apply a linear input profile which is slightly convenient, so I have chosen to select it.
A note: I have made some assumptions about how VueScan is doing the flattening from RGB to Monochrome. Mainly: that there won’t be too much information lost int he conversion. In my tests, I wasn’t able to notice any different between saving a 16-bit monochrome file vs a 48-bit RGB file and flattening it in darktable. The monochrome files are about 1/3 the size on disk.
Processing with DarkTable
Use the following modules in order to set a baseline:
- Input Color Profile: Linear Rec709 (or another Linear color space)
- Negadoctor:
- Film stock: Black and white
- Color of the film base: /select black edge/
- D max: select highlights
- tweak the exposure so there is no clipping on the histogram
- Monochrome: on
You should be able to copy/paste those settings across the entire roll. Once that is done, use the following modules on an individual basis to tweak:
- Crop/Orientation
- Base Curve
- Exposure
- Local Contrast: on