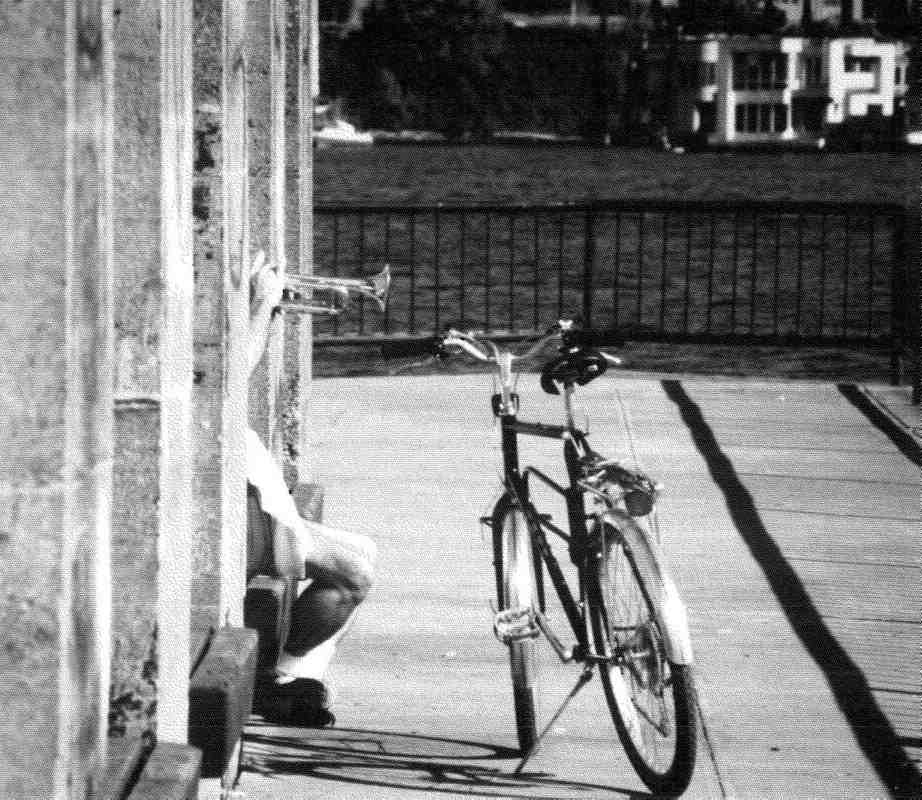
This 3x5 (originally color) photo and the examples below were scanned and processed as described here.
![[3x5 photo scanned with a fax machine]](fax.jpg)
Two techniques are described here:
To use a fax machine as a scanner for photographs, you want to set your fax machine to "photo" mode. This causes it to scan with 16 or 32 levels of gray and transmit that information by using a pattern of black and white dots called dithering. If you don't set photo mode, grayscale information from the scan will be forever lost. To scan a 3x5 photo, simply tape it to a full-size sheet of paper and fax it.
In order to gain access to the scanned bits, you will need to fax them to a computer running fax software. I used a PC and the "WinFax Lite" software which comes bundled with some modems to receive the scanned bits. If you have two phone lines, you can just send the fax to the computer.
Sending and receiving a fax on the same phone line.
If you have only one phone line to which both the fax machine and the fax modem are connected, you may still be able to send the fax if your fax machine will send without waiting for a dialtone and your computer fax software has a "manual receive" option which will go "off-hook" and begin receiving a fax when you tell it to (without waiting for the phone to ring).
If you are faxing with only one phone line, you must first quiet the phone line by taking a phone off-hook and waiting for the phone company to stop asking you to hang it up. This usually takes about 2-3 minutes. When you have a quiet line, simply instruct your fax machine to send (to a bogus phone number if that's the only way you can get it to begin) and then instruct your fax software to receive manually.
When your computer has received the fax, you need to ask it to export the fax in an image format you can manipulate. WinFax Lite can export as a TIFF file. If you have computer software (such as Adobe Photoshop) which will let you manipulate the image, use it -- otherwise you can transfer the image to a Unix system for manipulation. At this point, your image will look like a bunch of black and white dots:
![[dithered image]](fax0.jpg)
First, you will want to "cut" (or "crop") the photo image out of the center of the full-page fax image. On Unix you can do that interactively with "xv" or non-interactively with "pnmcut".
Next, you will want to "smooth" (or "blur") the image twice. On Unix you can do this interactively with "xv" or non-interactively with "pnmsmooth". The smoothing replaces each dot by the average of itself and the 8 dots surrounding it. This effectively undoes the dithering that "photo mode" on the fax machine did and turns the dot patterns back into gray levels. At this point, you may want to lighten or darken the image or fiddle with the "gamma":
![[smoothed image]](fax1.jpg)
Finally, you will want to shrink the image so it displays at roughly the same size on a monitor that it did in real life (probably a reduction of at least 50%. On Unix you can do this interactively with "xv" or non-interactively with "pnmscale". You may also wish to shrink the horizontal size by an extra 4% to compensate for the fact that fax machines scan 203 dots/inch horizontal but only 196 vertically.