Inserting, Sizing, and Configuring Tables
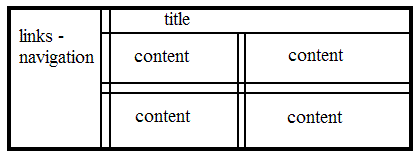
Now let's create a table like the one below:
In Microsoft Word, FrontPage, and Nvu (Mozilla Composer), click on the Table menu, choose Insert, and then choose Table. In Dreamweaver, Start with the Insert Menu and choose Table. Create a 5x3 table (5 columns by 3 rows) for this example.
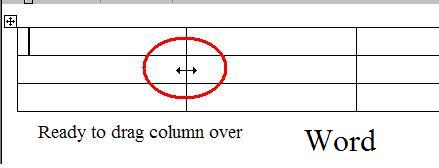
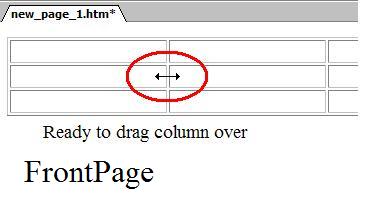
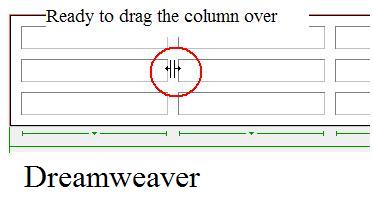
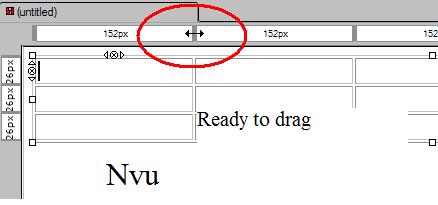
The first task is to move the vertical cell dividers over to create the two "spacer" columns. In Dreamweaver, Microsoft Word, and FrontPage, simply click on the line you want to move and drag it over:
In Nvu, the dragging takes place above the table. See below.
Next is "merging" or "combining" some cells in the table.
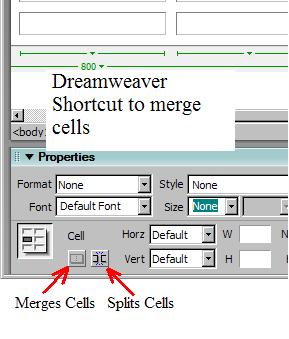
First, click and drag over the cells in the table to merge. In MS Word and MS FrontPage, use the Table menu and choose "Merge Cells." In Nvu use the Table menu and choose "Join Selected Cells." In Dreamweaver, use the Modify menu, choose Table, then choose "Merge Cells." In addition, Dreamweaver has a shortcut merge icon (shown below):
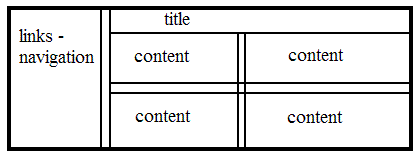
Merge cells until you have this table:
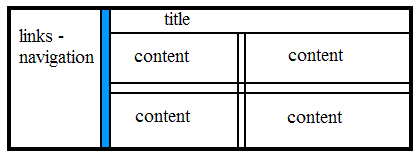
Let's finish this table by using some background colors in the cells. First, merge the cells in the left "spacer" column. The table will now look like this:
Now, click in the new long vertical cell on the left, and go to Table properties and get to Cell properties. Change the Background color to a color you like (I like blue). The table now looks like:
Now, click in the top cell (Title cell) and turn its Background color into a color.
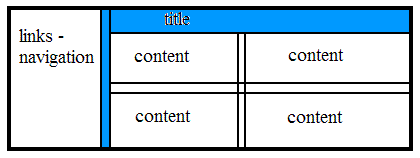
The last thing we will do is type some text into the cells and make the table "invisible." Go ahead and type some text into the cells See if you can figure out how to make the font larger.
To make the table "invisible," go to Table Properties, and make the border size be 0. The table borders will still be visible in the program, but when this page is saved as a web page and viewed in a browser, the border lines will disappear and the table will look like this: