Section 3 Create a PostgreSQL database
Before we can start working with a database, we need to have one to which we can connect. This could be a database running on a remote server or a database being served on one’s own local machine. For this workshop, we will use a locally running database server.
These assumptions need to be met before proceeding:
- PostgreSQL is installed and running on port 5432 of the local machine
- pgAdmin 4 is also installed
- the password for the PostgreSQL superuser (“postgres”) is known
3.1 Tuning
There are some settings that will make your PostgreSQL session more responsive. These get changed in the postgresql.conf file within the data folder of your PostgreSQL installation. See Tuning Your PostgreSQL Server. For my laptop with 16 MB of RAM I used these non-default settings:
shared_buffers = 4GB
work_mem = 50MB
maintenance_work_mem = 50MB
effective_cache_size = 8GB
After changing these settings, it is necessary to restart the PostgreSQL service (use “Services” in Windows or under Mac, use pg_ctl -D /usr/local/var/postgres -l /usr/local/var/postgres/server.log restart or brew services restart postgres.
3.2 Use pgAdmin 4 to manage the server connection
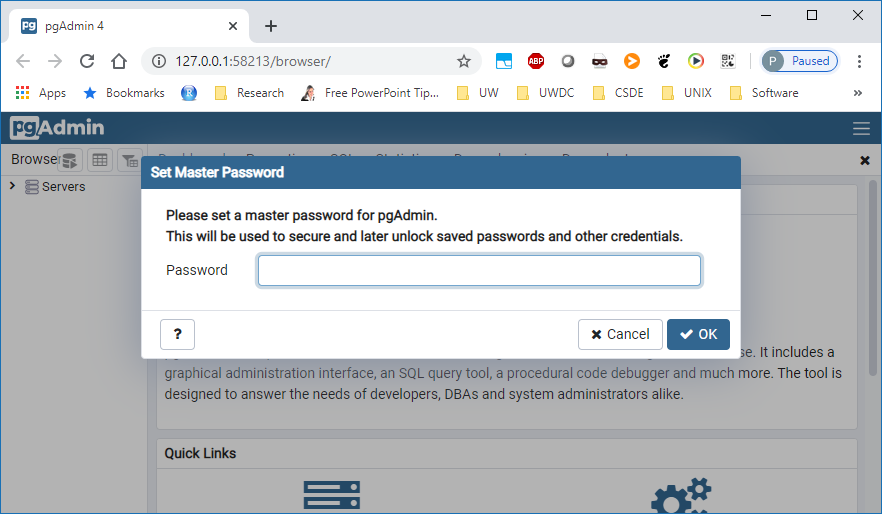
Open PGAdmin 4. If prompted for a master password, enter one and make sure you have recorded it somewhere that you will be able to retrieve later.
Tap the the server for the new PostgreSQL installation on the left hand pane. On my computer I have installed several versions of PostgreSQL; for this workshop I will be using version 12.
Enter the postgres superuser’s password. You may or may not want to save the password; not saving is more secure.

3.3 Create the rsql database
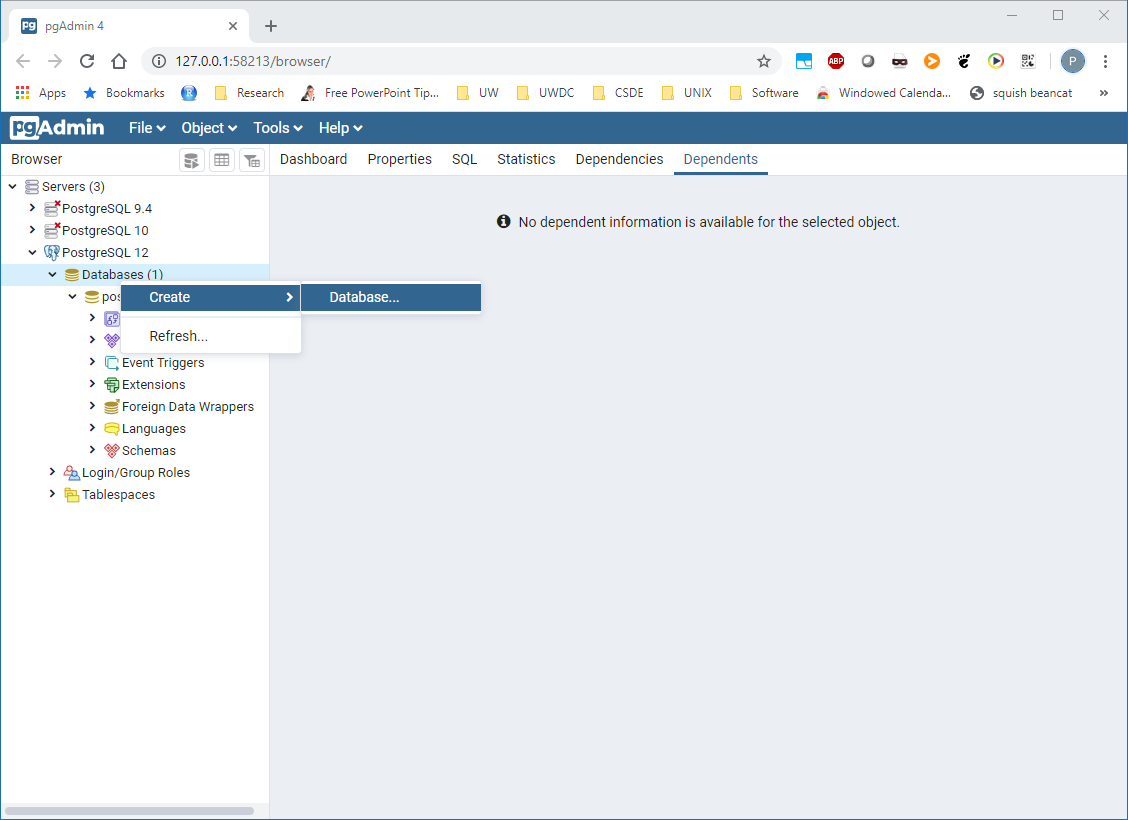
Having connected to the server, we will now create a new database named rsql. R-click the server and select Create > Database.
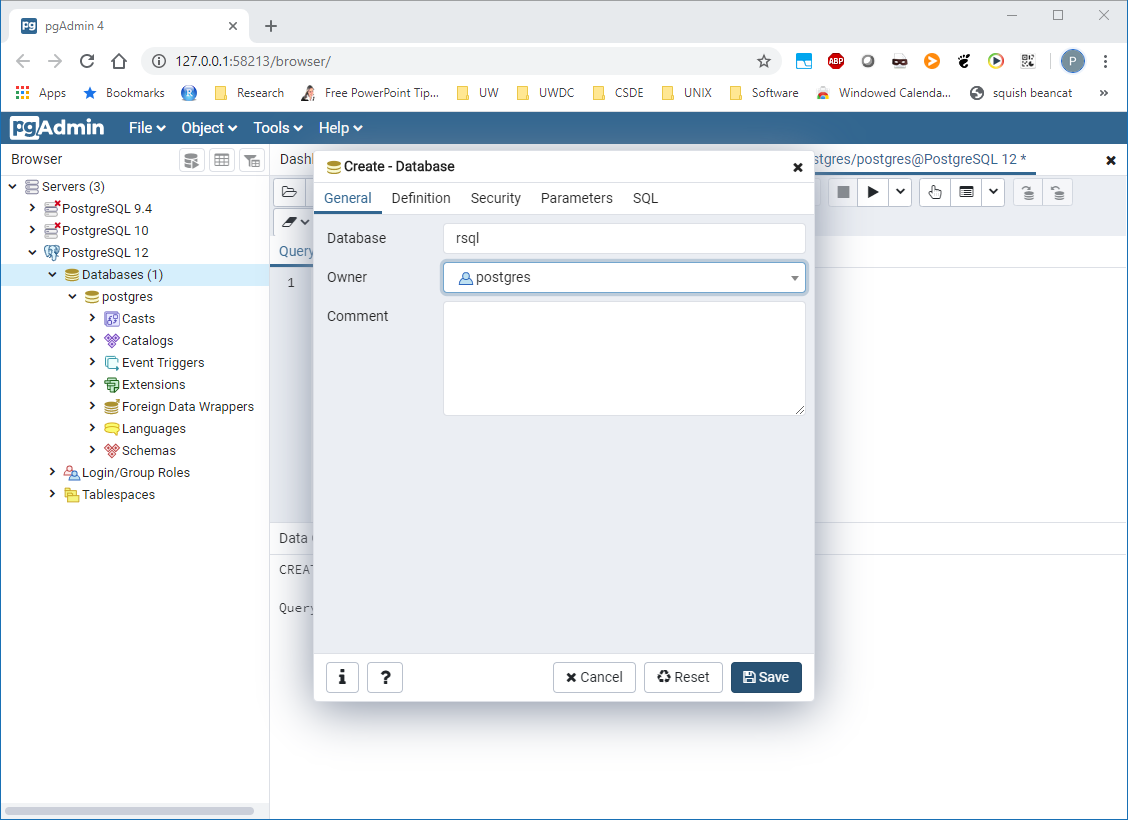
And enter the database name rsql. The owner should be postgres.
3.4 Create a user, some schemas, and set default privileges
Next, R-click the new database and select Query Tool... to run a new query. Enter the text:
--create the user for the workshop
create user csde with encrypted password 'gis';
--default high level privileges for this user
alter default privileges grant all on schemas to csde;
alter default privileges grant all on tables to csde;
alter default privileges grant all on sequences to csde;
alter default privileges grant all on functions to csde;
--create a few schemas
create schema gps; --for some data
create schema addhealth; --for add health data
create schema postgis;
create schema census;
--extension
create extension postgis with schema postgis;
--alter search path
alter database rsql set search_path = "$user", public, postgis;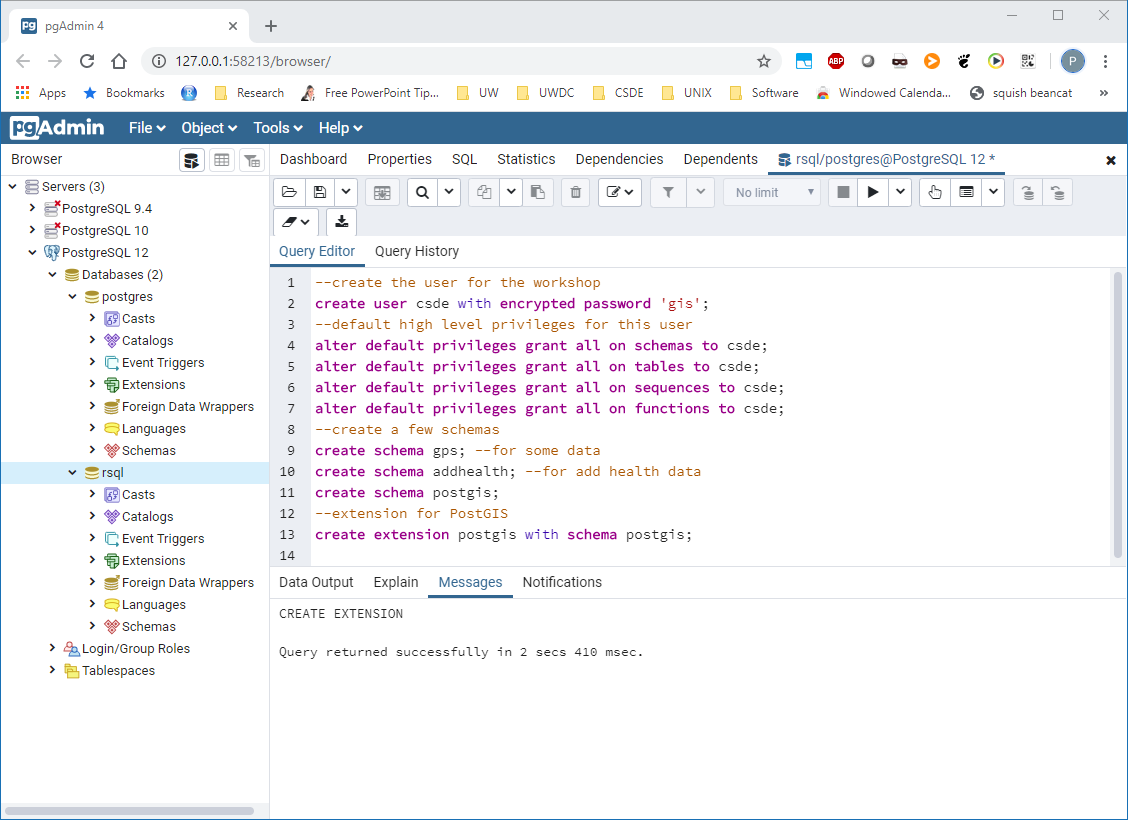
Then tap F5 to run the query. The query will add a new user with the username csde and password gis. Some schemas will be created to store various tables. [You can think of PostgreSQL schemas functioning similar to folders in the file system.] Then default privileges will be applied to those schemas so the csde user will be able to create tables, etc. The query also loads the PostGIS extension into the postgis schema.
3.5 Set up the pgpass file for passwordless connection
Now that we have created the database, most of the interaction will be performed within R. However, to facilitate using the database without entering passwords every time, we will create the pgpass file (see https://www.postgresql.org/docs/current/libpq-pgpass.html).
The pgpass file allows connections to the database in specific contexts not to use a password. Passwords are therefore not required to be stored in scripts. The file itself does contain your password in clear text, but the file should be not readable by anyone other than administrative users.
For Windows, first navigate in the Windows Explorer (file manager) to %APPDATA%. If you do not see a folder named postgresql, then create it. Next, create a new Text Document named pgpass.conf. Accept or ignore any warnings you may get about the functionality of the file. Next, tap the keyboard combination WIN+R (for Run) and enter
notepad %APPDATA%\postgresql\pgpass.confFor Mac, enter
nano ~/.pgpasswhich will open the pgpass file. Enter the string
localhost:*:*:csde:gissave, and close the file.
For Mac users, also enter the following command to correctly set file permissions
chmod 600 ~/.pgpassThis means on the local machine (localhost), for any ports or databases, user csde: supply the password gis. Essentially, it allows accessing this specific database for this specific user with no password needed. Test this:
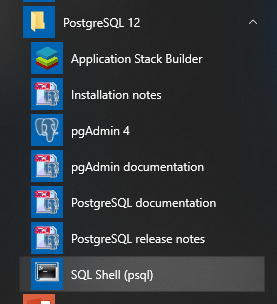
Windows: open the SQL Shell
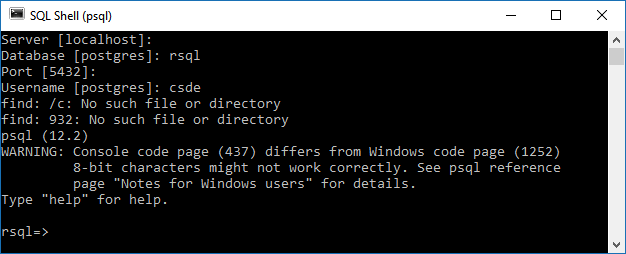
Only enter the database and user name at the prompts. If you have correctly set up the pgpass file then as soon as you enter the username you should see the psql prompt, showing the database name (rsql).
Mac: open a terminal and enter
psql -U csde rsqlIf you have correctly set up the pgpass file, you should see the psql prompt, showing the database name (rsql).
