Click here to download a PDF doc version of these instructions.
Equipment: (PDFs of the full User Manuals are available)
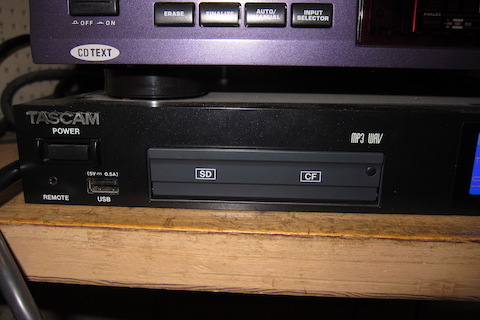
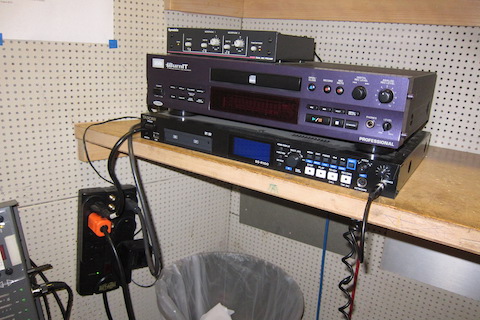
-Tascam SS-R100 Memory Card Recorder
-HHB CDR-830 CD-R/RW recorder
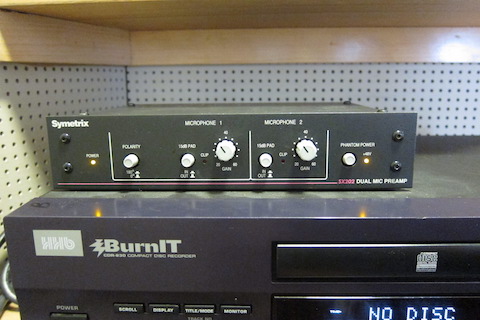
-Symetrix SX202 microphone preamplifier
-Audio Technica AT825 stereo condensor microphone
Click here for PDF manuals.
NOTE: You can use either the CD-R or Memory Card recorder or both at the same time.
-Audio Technica AT825 Microphone Hook-Up:
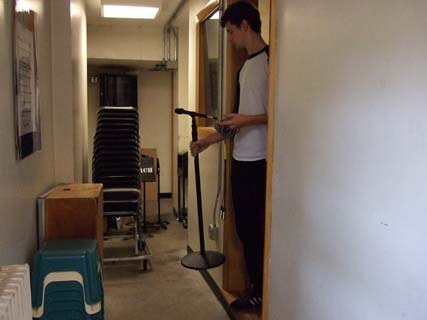
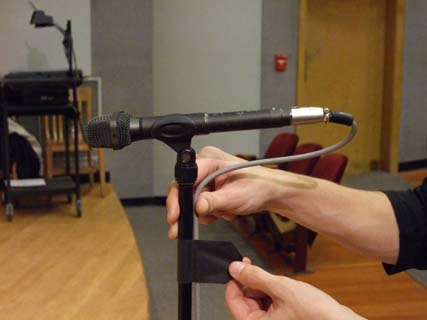
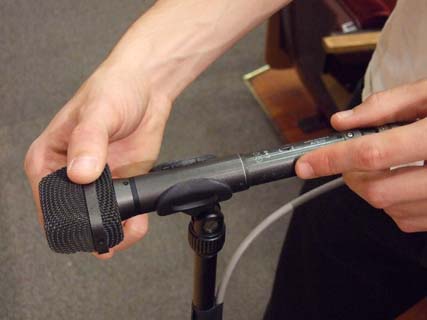
1) Put the stereo microphone on one of the stands (stands are kept in the booth). Note which side is Left and Right from the diagram on the mike.
2) Attach the 5-pin connector end of the cable to the microphone. You may wish to tape the cable to the stand near the top.
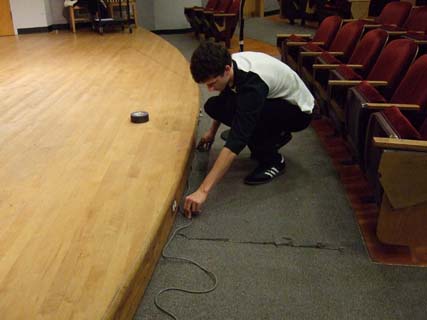
3) Take the whole microphone, stand and cable assembly out into the auditorium, and place it in front of the stage pointed at the performers. Some people prefer the microphone close, some prefer it farther away.
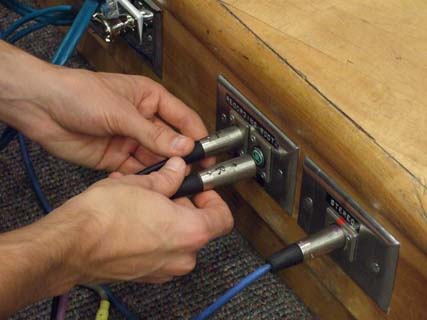
4) Plug the double ends of the cable (with 3-pin XLR)into the connectors built into the stage. There are 4 possible stage connectors to use. You need two. Two connectors are on the audience left stage front riser, marked "RECORDING BOOTH 1 - 2". Two more connectors are on the audience right stage front riser, marked "RECORDING BOOTH 3 - 4 Usually, #1 is used for LEFT and #2 is used for RIGHT (purple jacket on microphone cable).
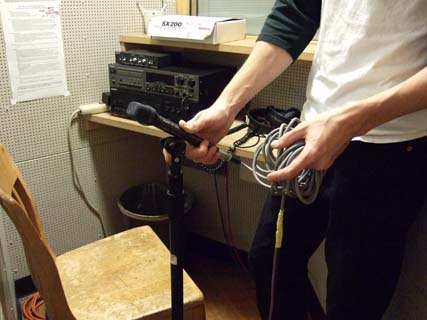
-Symetrix SX202 Microphone Preamp:
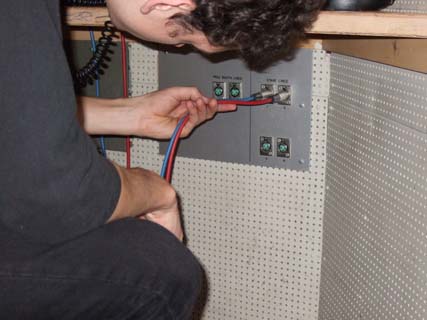
1) Look under the countertop in the booth to see if the cables are connected to the same numbers that the microphone in the auditorium is. Usually, the blue cable (LEFT) is connected to #1 and the red cable (RIGHT) is connected to #2. Connect these to the proper # if they are not already. Note that there are push-releases on the wall connectors here.
2) Check the Symetrix Mic Preamp - Power light and 48 Volt Phantom Power light must be ON. Channel 1 Polarity should be left at 0 degrees. Both channels' Pads should be OUT. Both channels Gain should be left at 30 dB (about 10 o'clock).
-TASCAM SS-R100 Memory Card Recorder:
1) WARNING ON SLOW MEMORY DEVICES - Some memory devices are too slow to work reliably on this recorder and may stop recording after some time. Most devices made in the last few years should be OK, but there is no way to test except by trying it. Generally, Class 2 or higher SD/SDHC cards, 80X or higher CF cards, and "hi-speed" USB sticks work. It is recommended to use higher speed (photo-grade) SD/SDHC/CF cards. Card specs: USB memory (512MB Đ 64GB); SD card (512MB - 2GB); SDHC card (4GB - 32GB); CF card (512MB - 64GB, Type I only)
2) WARNING ON CARD FORMATTING - Some memory device formats are not compatible with this recorder, or may not work reliably even if the format is correct (FAT32). It is highly recommended to dedicate your memory device to this recording and to reformat it (erase it) on this recorder.
3) Select your memory device and reformat it - Insert your memory card or stick. Push the "DEVICE" button repeatedly to select it on the screen, then push the MULTI-JOG knob in. Next, push the MENU button, turn the MULTI-JOG knob to select 3-UTILITY, push the knob to select, turn the knob if necessary to select 1-MEMORY FORMAT, push to select, push to say YES. Exit the menu with the HOME button.
ADVICE ON AUDIO FILE FORMAT - For best quality we set the recorder to uncompressed WAV format at 16bit-44.1kHz sampling rate, making it easy to use a computer to make audio CDs or downgrade to MP3s. You can change the settings to MP3 of varying bit rates, but this will compromise quality especially if any editing is done later. WAV needs about 650MB for every hour of recording, and the DOS 2GB filesize limit is 3 hours 22 minutes, but the recorder will simply continue on a new file for longer recordings. If you use MP3 mode, please return it afterwards to WAV.
4) Check Record Mode and Level - Push the RECORD button, and the Tascam goes into REC+PAUSE mode. The screen shows the file format at the bottom (WAV recommended), the track (file) number, file elapsed time, file time remaining, audio levels, etc. Adjust recording level by pushing the FUNCTION button and turning the MULTI-JOG knob to select INPUT; push knob to select and turn knob to adjust input level. Adjust level so the loudest music does not go into OVER. Medium loud music will be about -12dB or so, giving room for louder peaks. Exit with the HOME button.
5) Enter RECORD mode by pressing RECORD then PLAY. The elapsed time should advance, indicating recording. After stopping a recording, let the Tascam take a moment to finish writing the data as shown on the screen. Memory devices are hot swappable as long as they are not actively writing/reading. Immediately advance to a new file by pressing RECORD while recording.
6) Playing files - Push the FINDER button. Note that Tracks/Files have filenames like T001_20120821 (track #_date). Select your file with the Multi-Jog knob, push PLAY. Pushing the knob will select other options besides playing. It is true that the levels do NOT display during playback.
-HHB CD-R/RW Recorder:
1) WARNING ON QUALITY OF BLANK CDRs - Many blank CDRs or CDRWs will work in this recorder, HOWEVER many do not work well, and you won't know until after the recording is played back afterwards. The biggest problem is that most blank CDRs work better at fast copying speeds, like on a computer, and poorly at real-time recording. Some blanks are just poor quality. One clue is if the recorder seems to have trouble recognizing a blank when inserted, and/or refuses to allow recording.
The only consistently reliable brand we have found is Taiyo Yuden cyanine. Since these are hard to find, we keep a stock of them and make them available to SoM students for recital recording on request. If you have no choice but to use other brands and end up with a bad recording, sometimes we can fix it afterwards. (contact Gary Louie, louie@uw.edu or phone 206-543-1218)
2) The input must be set to "ANALOG" as shown on the display. If it is not, push the button, "INPUT SELECTOR" until it does.
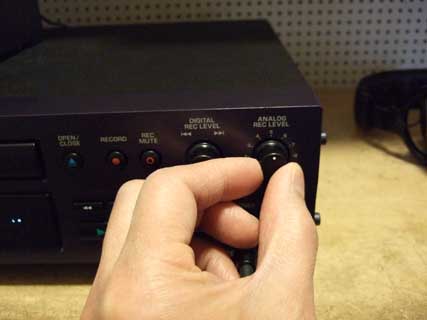
3) You can monitor the sound to set levels without any disc in the recorder. Push the "RECORD" button, or the "MONITOR" button, the display will say "MONITOR" and the recorder will show audio levels. Avoid having any level go over zero or distortion will occur. Medium-loud music will typically hover around -12 dB on the meters. Adjust recording level with the ANALOG REC LEVEL knob.
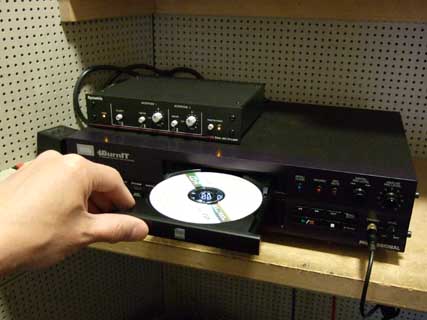
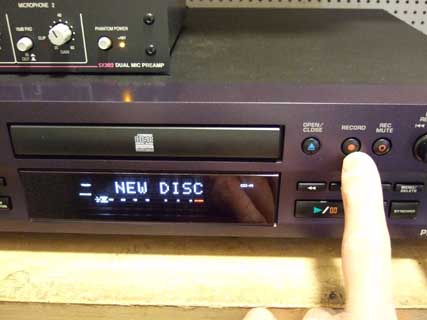
4) Load a blank disc. Wait for the recorder to analyze the disc (the display shows: CDR?CDRW?TOC READ), and ultimately displays "NEW DISC" which should take about 20 seconds. When "NEW DISC" is displayed, press the RECORD button (red dot) and the recorder will display (REC-ANALOG-SETUP) and go into Record+Pause mode on track 1 with 0 minutes 0 seconds. Press the PLAY/PAUSE button to start recording.
5) Track numbers: Look at the display: if "AUTO TRK" is lit, the recorder will place new tracks after detecting a few seconds of silence. For manual track numbering, press the "AUTO/MANUAL" button to turn Auto Trk off. Press "RECORD" while recording to advance track numbers. There is a 4 second minimum between track numbers.
6) After stopping DO NOT TURN OFF THE POWER UNTIL THE RECORDER IS FINISHED DOING PMA WRITING (about 5 seconds). The disc will be unreadable and unusable if you do.
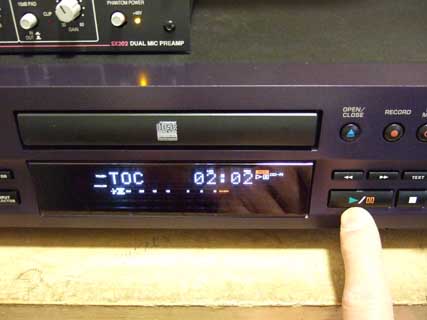
7) IMPORTANT: in order for the disc to be playable on a CD player, the disc must be "FINALIZED." Press STOP. WAIT for the recorder to finish "PMA REC" and show recorded time. Press the FINALIZE button, wait for "TOC+time" display, then press PLAY/PAUSE button to start finalization. WAIT up to 130 seconds for the recorder to finalize the CDR. If you don't finalize, the CD-R will not be playable on a CD player, however, it can be finalized at some other time. If you want to return later to record some more on the same disc, do not finalize; subsequent recording will continue where you last stopped. After finalizing, you cannot add more music to a CD-R disc. CD-RW discs can be Unfinalized, or erased entirely and reused.
Please switch off the recorders when you are done. RETURN ALL EQUIPMENT TO THE BOOTH AND LOCK THE DOOR.
Contact Gary Louie in the School of Music Recording office Room 32 for questions or to report problems:
phone 206-543-1218, email louie@uw.edu
PDFs of the full instruction manuals are available.
(6 Sept 2021)